You Are The Universe
In the second year of the Communication & Multimedia Design program, you had to get two SRP credits. I chose to come up with my own project and work on it. This is a video I made using a youtube course for beginners and my own research, to learn how to work with Adobe After Effects. I have wanted to learn After Effects for a long time so this was very enjoyable to do.
What is the video about?
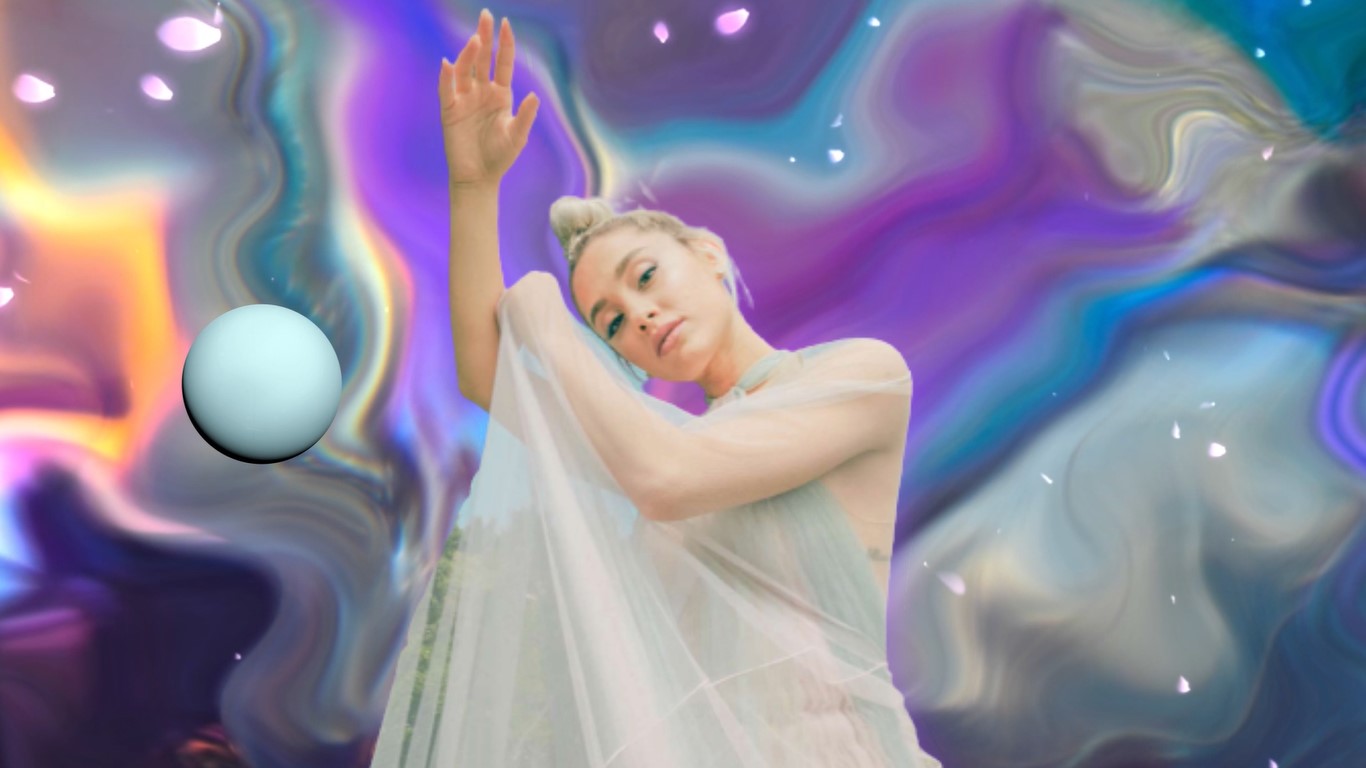
I chose to make a video with a gentle message. I combined the audio myself from three other audios. The video is about the fact that we humans are often not aware of our impact on the world and that we often think that the world has become like this because of the past and that nothing can be done about it. That you can't change it. And that we actually need to realize that everything we do has an impact on each other, just like dominoes. Each of us has an impact each act is a choice you make creates a future. It is in our own hands to have a better world and future. Personally, I find the message very inspiring and it reminds me of exactly what I like about my own ambitions. I want to create useful applications or websites, I want to make videos that take my mind off the real world and allow me to use my imagination. All points where you can implement the message (that on a personal level). But on a global level that would be climate change, a very important issue.
What I learned: Composition
You always create a composition when you start with your Adobe After Effects. It serves as a type of canvas. To further explain this I will give an example: Without a sheet you can not draw, in After Effects neither. So without a composition you can't create images, animations or anything. But you don't have to use compositions just at the very beginning. Compositions can also be used to put elements in their own folder and edit them in their own tab. This is called pre-composition. A pre-composition is useful if, for example, you want to update a particular element so that it works as a whole in the main composition.
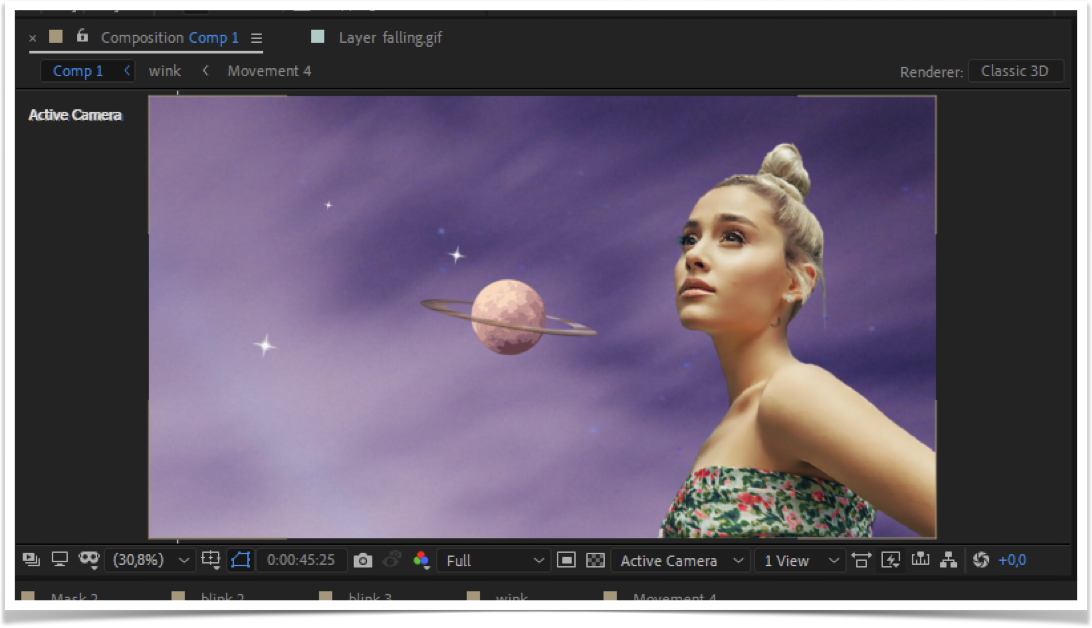
What I learned: Animation with a path
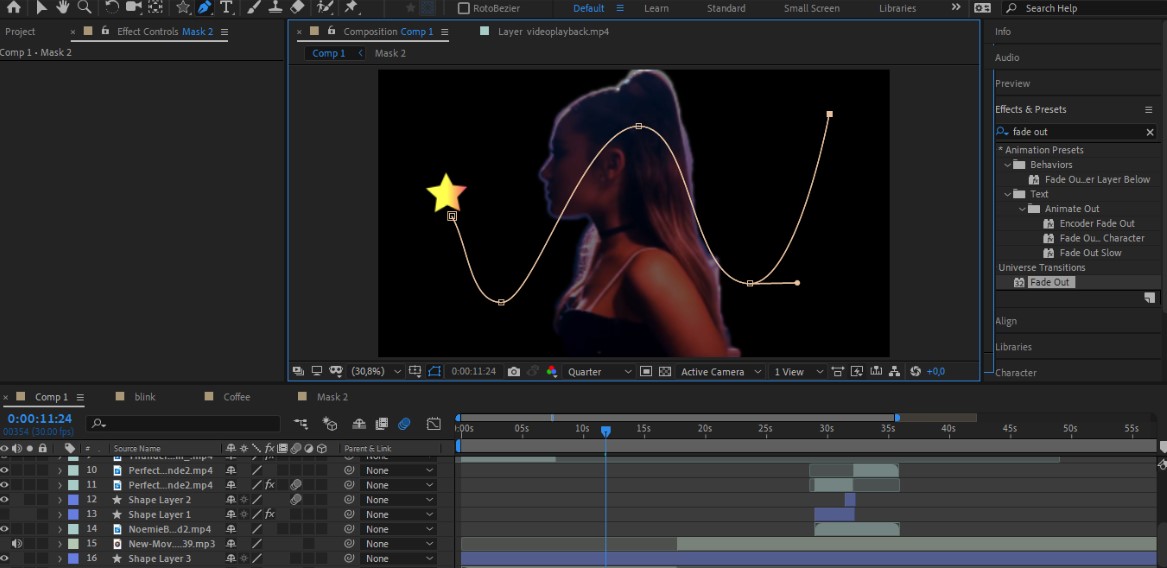
An animation with a path is different from position, scale, rotation and opacity tools. As the name implies, a path is a path. When you create an animation that follows a path, you make sure that the animation automatically follows that path. For example, in my video I made a star follow a path. With paths you can create more fluid lines which is not easy to achieve with the position tool. Paths don't have to be used only as a "path" for animations. With paths you can also create shapes. In my video, I created a coffee cup by connecting paths.
What I learned: Make a static picture blink
This is perhaps one of the most fun things I've learned in After Effects is to make a still photo blink. I did this by using the liquify tool in After effects and smudging the eyelids down. This makes it look like the eyes are closing and when you play this back to back you get a really cool effect.
What I learned: Masking

Masking is a tool you use to remove backgrounds from videos or photos. You start by double clicking on your element so that a layer tab appears next to your composition. Click on the tool and draw over the object you want to keep.
What I learned: Pin-tool
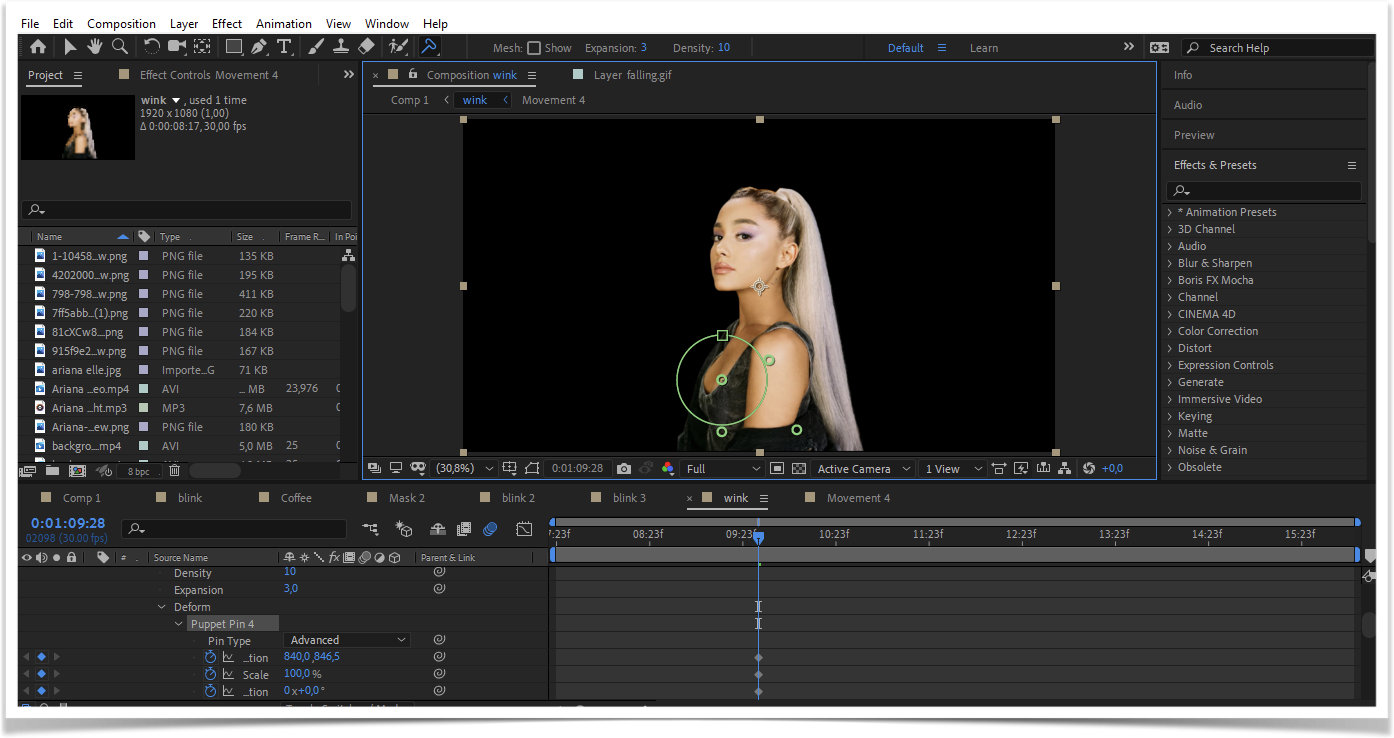
Pin-tool is a tool I used to make a PNG move. With the pin tool you put a lock on a number of points. This part will not move after that. Then you rotate the image, by using the keyframes an animation is established and you get from a still image a moving image. The same idea as the position, scale, rotation and opacity functions. But with this you move the whole element over your composition. With the pin tool you move the element within itself.
The video
Enjoy watching the video!